Strawberry Planter

Instructions
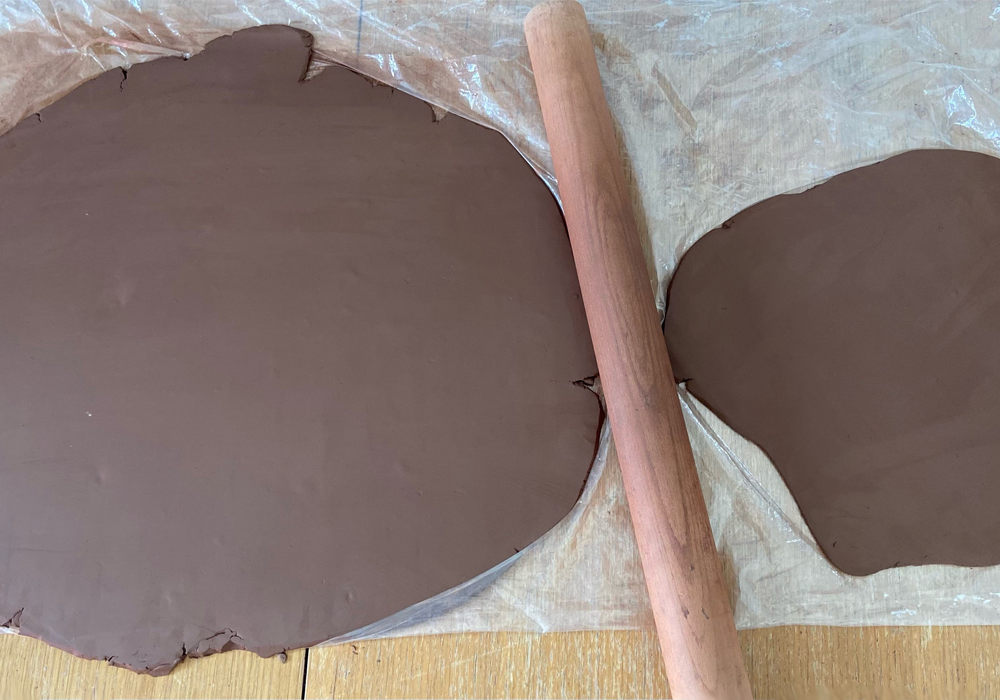
1) Using guides, roll out 2.5kg of clay, keeping
the shape as close to rectangular as possible.
Roll out a separate 500g of the same clay and
allow to dry to a leather hard state (the clay will
bend and support its on weight but does not
leave finger marks when handled)
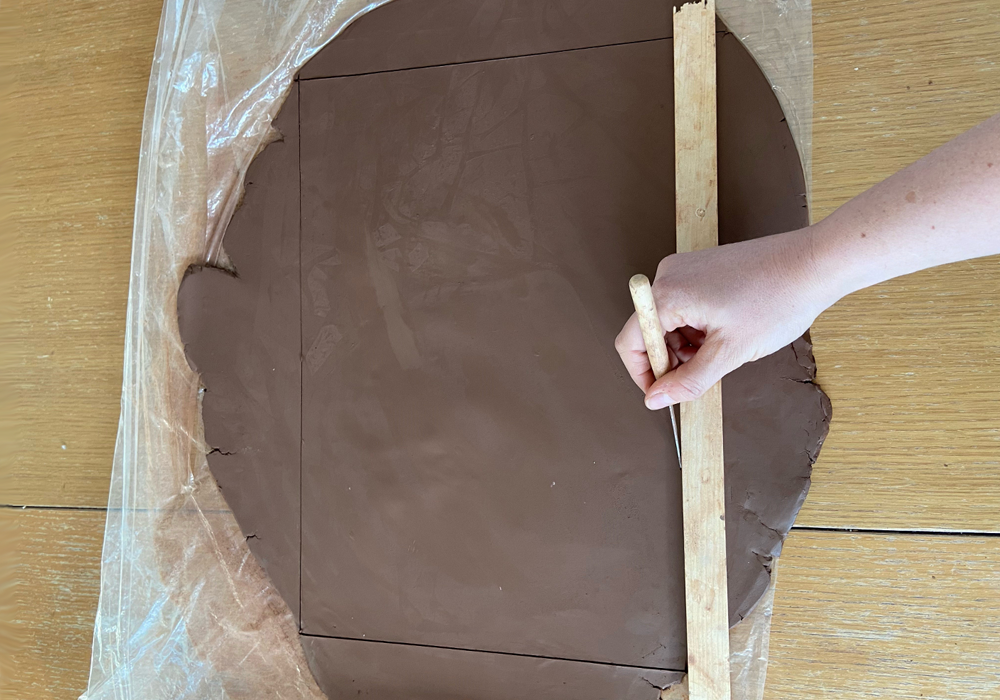
2) Cut out a rectangle as large as your rolled
out clay will allow from the large slab of clay
(ours measured 40cm x 28cm).
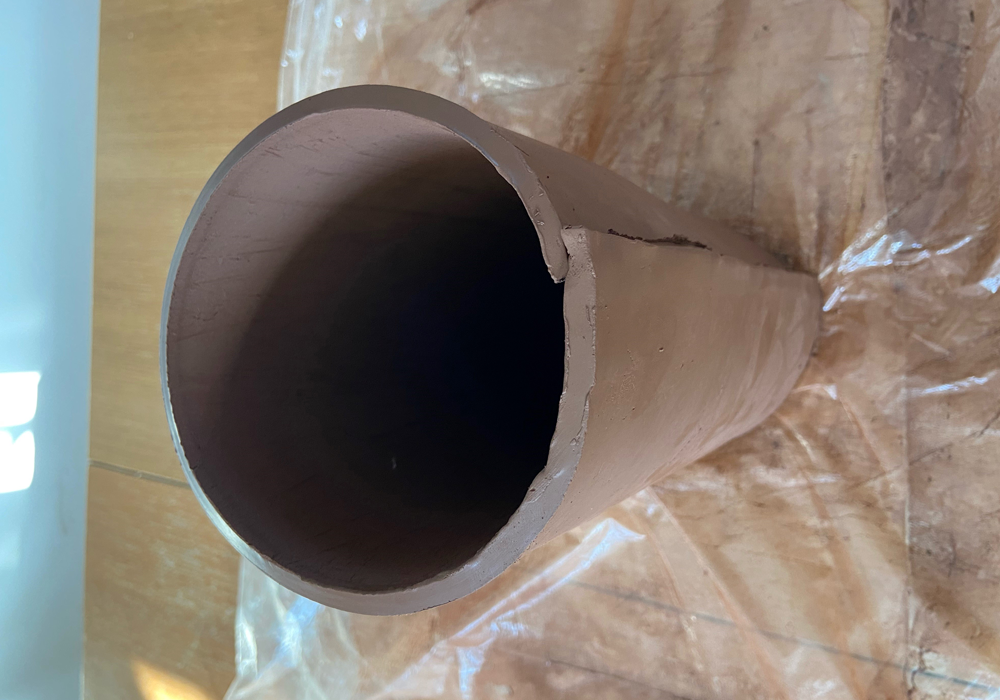
3) Stand the clay on its edge and bend into a
cylinder with the edges slightly overlapping.
4) Using a sharp knife cut the clay at an angle
from the top of the cylinder to the bottom.
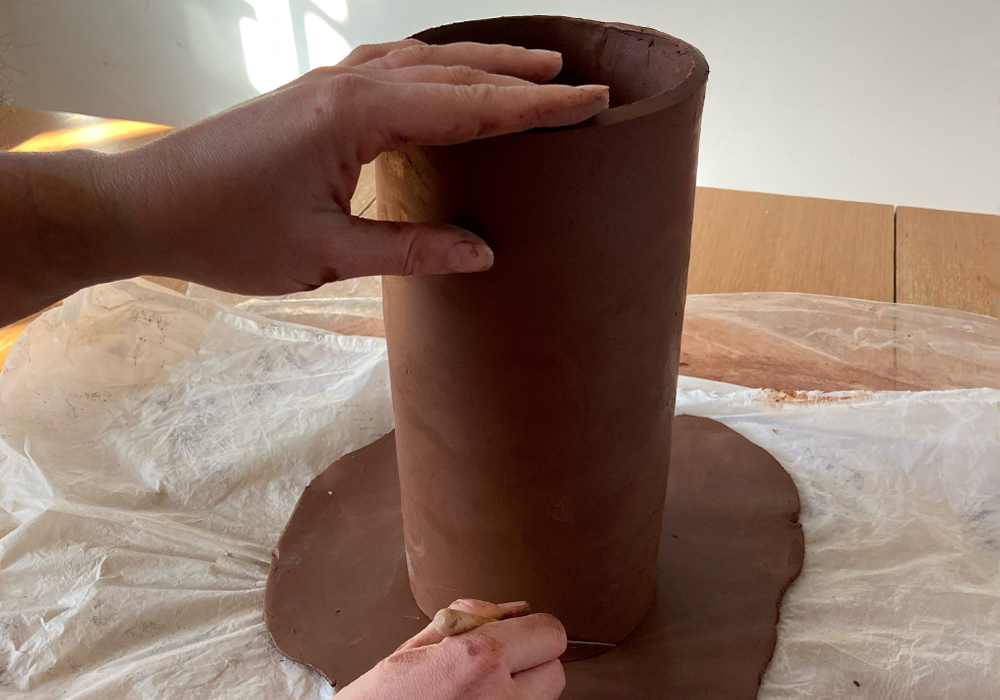
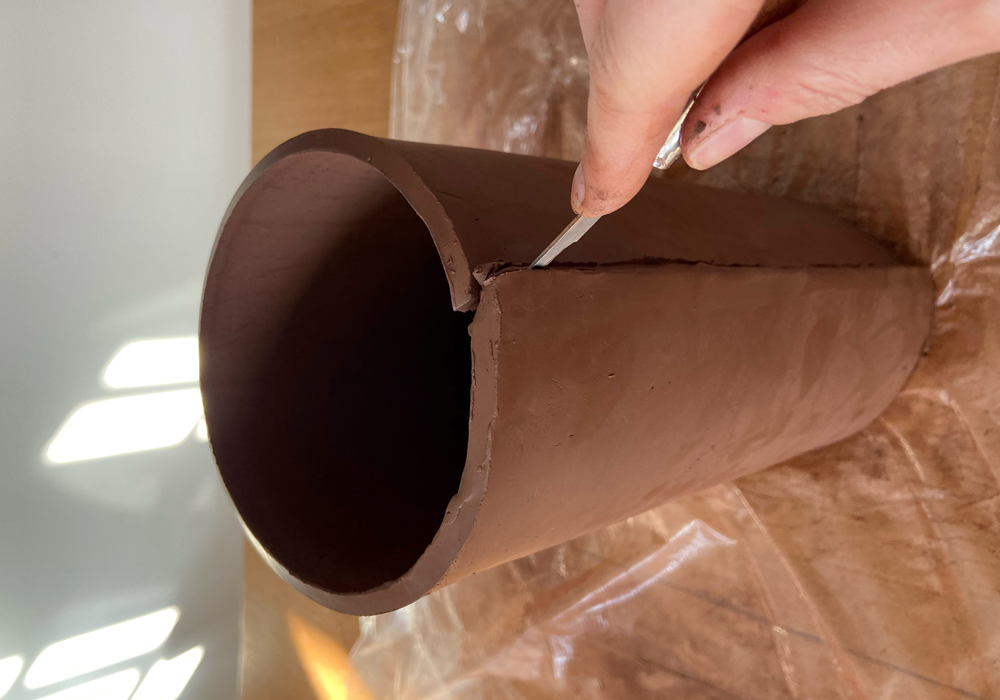
5) Score and wet the edges and join together,
smoothing the seam together with your fingers.
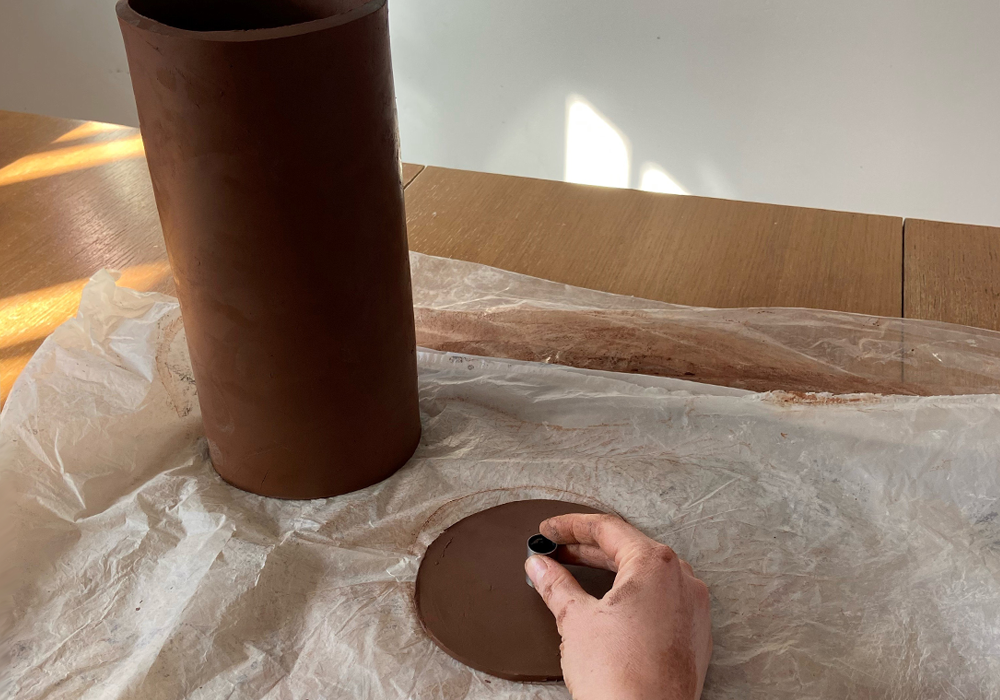
6) Stand the cylinder on top of the small slab,
using it as a template to cut out a circle (this
will be your base piece).
7) Cut a small drainage hole in the base piece.
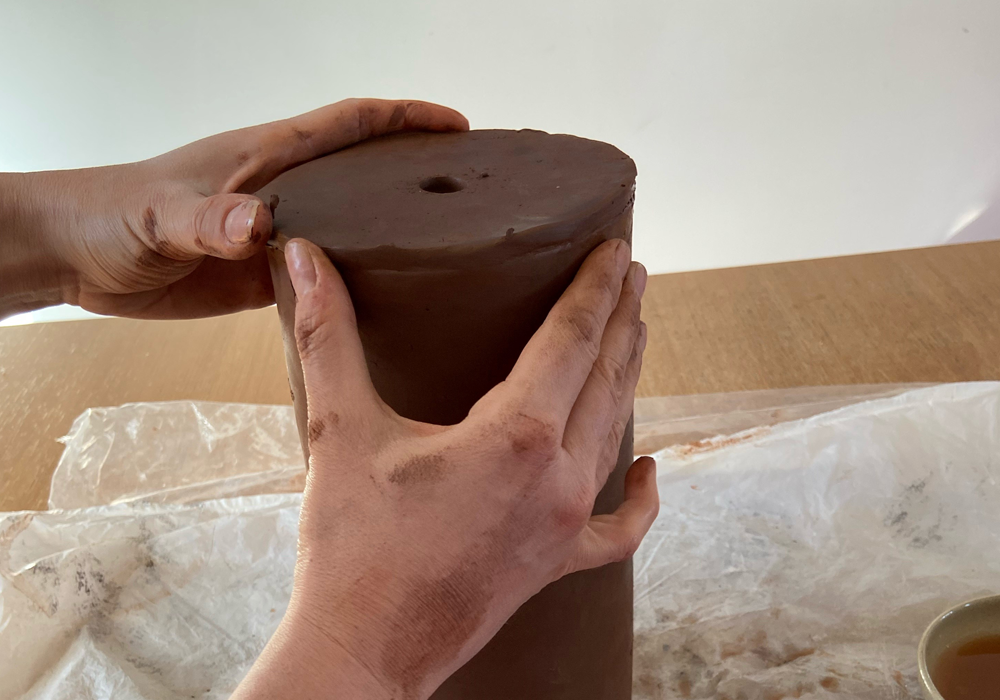
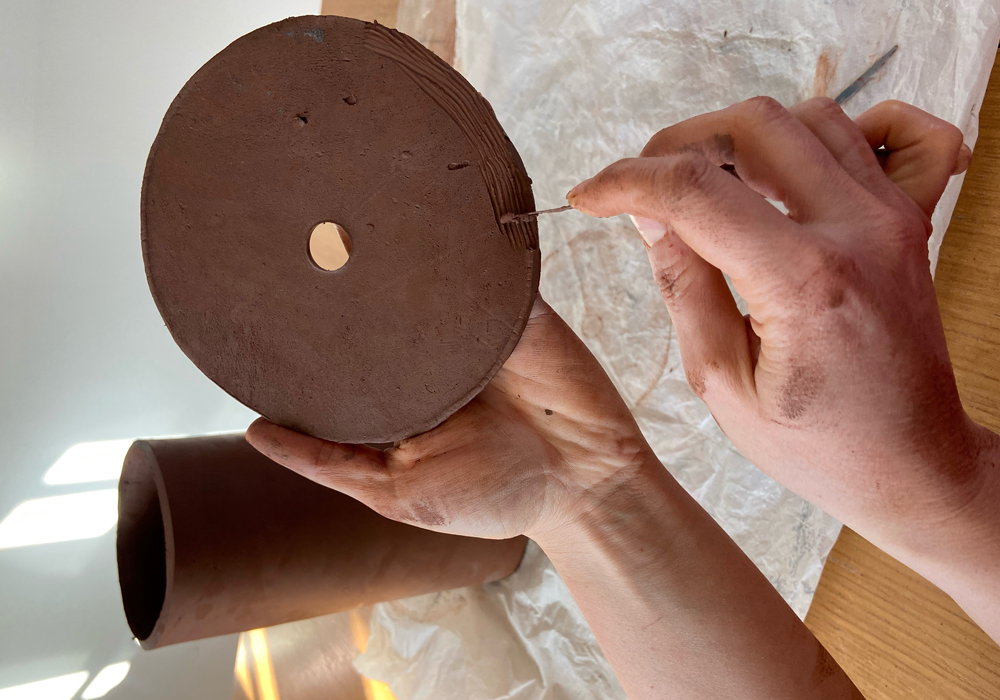
8) Score the edges of the base and the top edge
of the cylinder. Wet the edges and join together,
using your fingers to smooth over the join. Turn
the cylinder over.
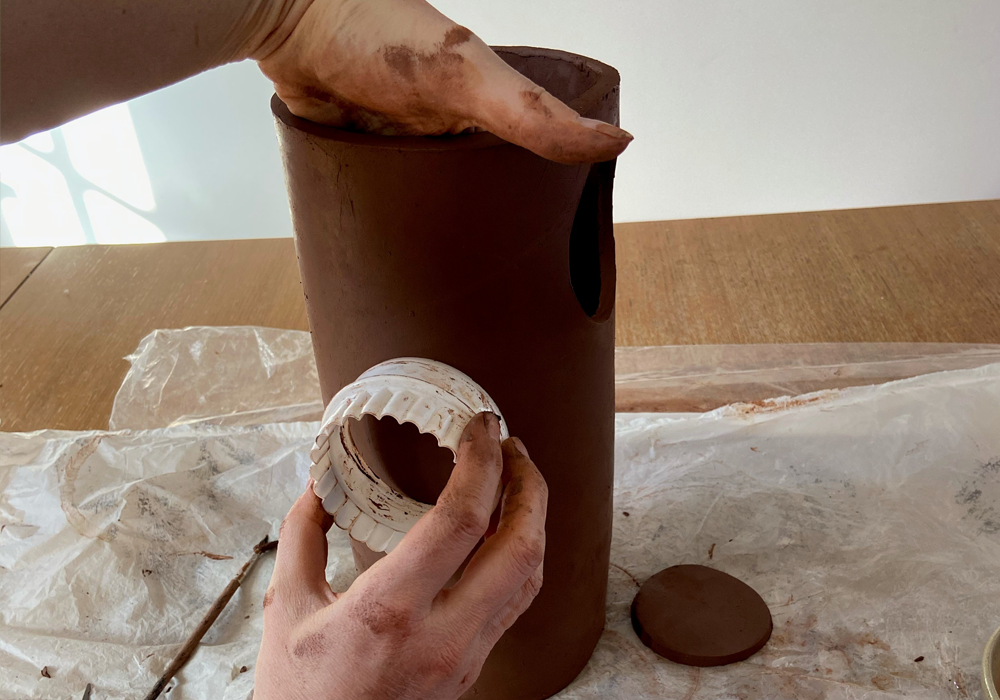
9) Using a circular cutter (we used a 7cm cutter)
cut out holes in the cylinder, keeping the cut out
clay disks.
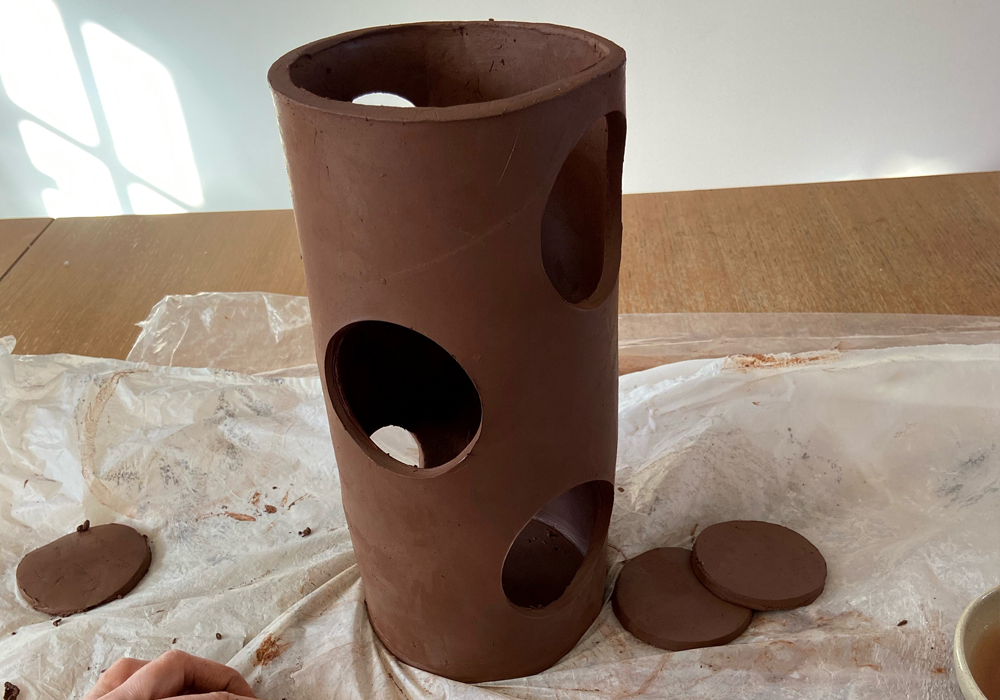
10) Cut the clay disks in half.

11) Score and wet the edges and inside the holes.

12) Slightly bend the half disk and place inside
the hole, gently securing to the walls inside the
cylinder and use a paintbrush to smooth the joins.
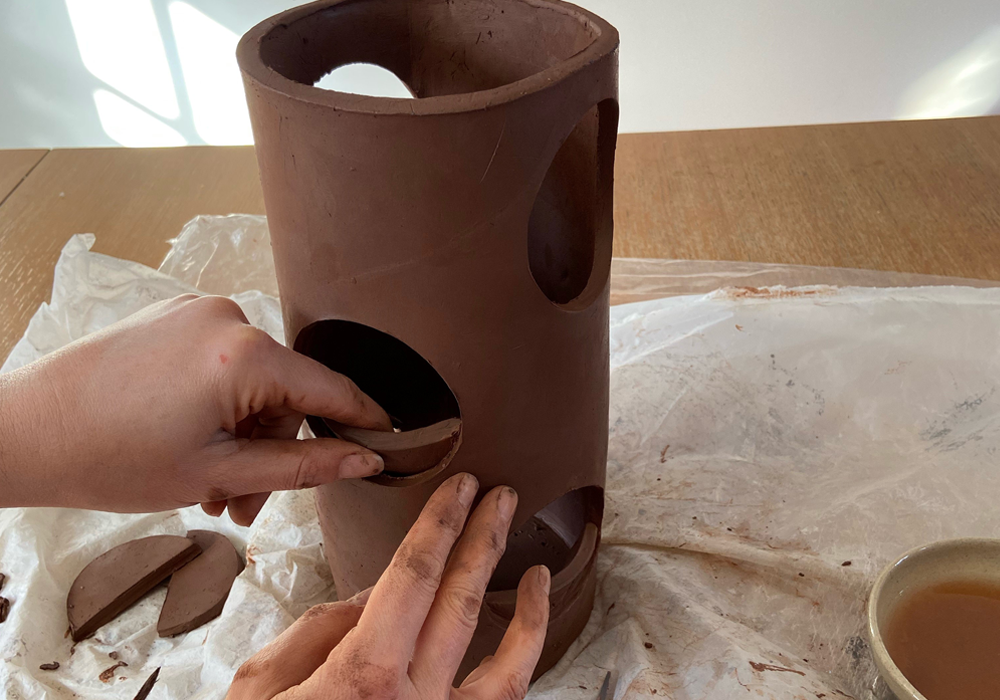
13) Repeat on all holes.
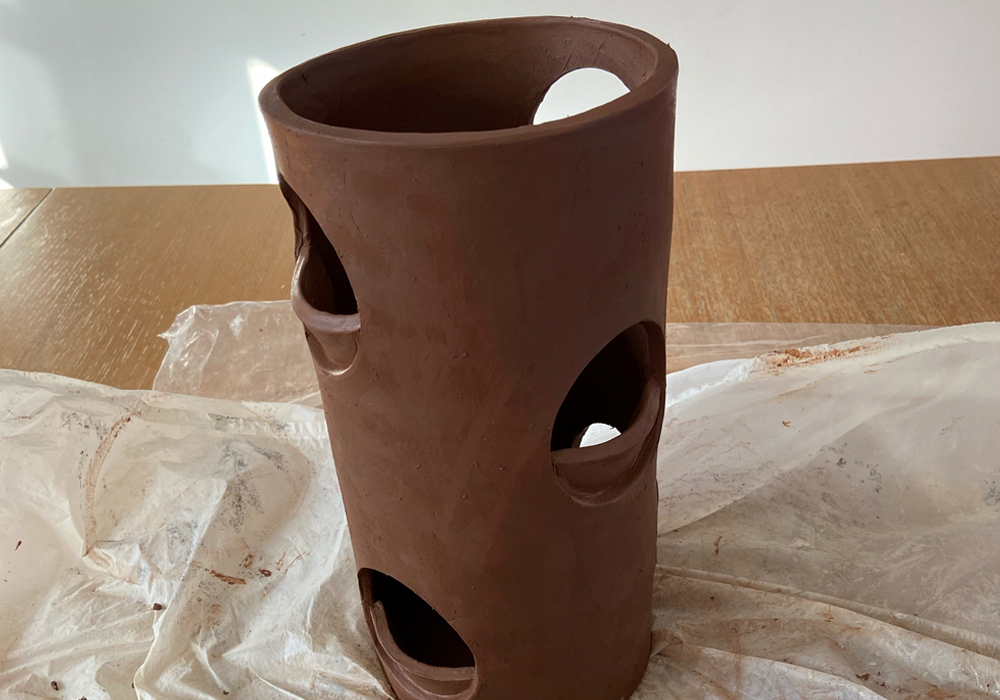
14) Allow to dry fully before bisque firing to 1100°C
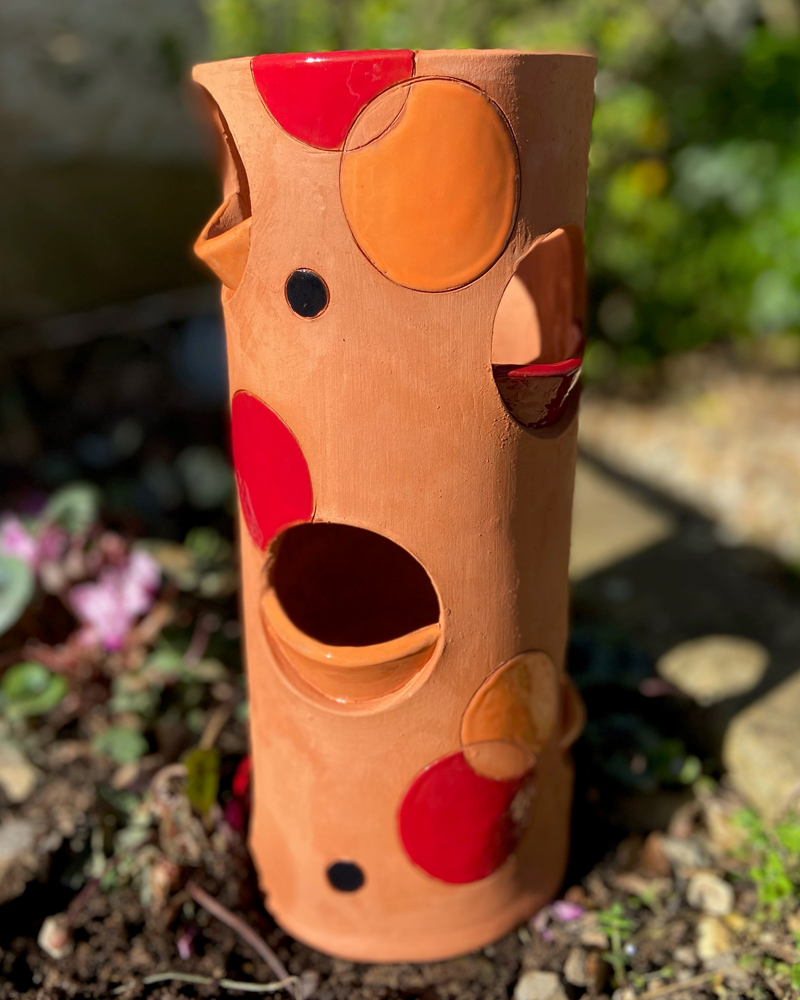
15) Decorate to your own taste using Vitraglaze
before firing again at 1040°C
We Used
VitraGlaze Earthenware: Pitch Black